2. 순서정하기: “Humpty Dumpty”를 다시 맞추기
이야기를 다시 말하기 위해 그림을 이용하시고 여러분의 학생이 텍스트의 주요 구성 요소, 인물, 사건을 기억하는데 도움이 됩니다. 여기에 방법을 소개합니다.
준비하기 위해, 여러분은 숫자와 문자가 붙어있는 한 묶음의 그림 문제지를 만들 필요가 있겠죠. 그림 밑에 바로 여백이나 선이 있습니다. 그래서 여러분의 학생들이 그들이 본 것을 토대로 그림에 번호를 확실하게 붙일 수 있게 하세요. 여러분의 학생 수준에 따라, 여러분은 번호 부여 연습을 철자와 문장 구성을 연습할 수 있도록 완벽한 훈련으로 바꿀 수 있습니다.
또한 여러분은 이야기 두 개의 복사본이 필요할 겁니다. 각각 행간 여백 없이 글씨를 쓰고, 두 부분으로 나누세요. 각각에 “이야기 1”, “이야기 2”로 써 넣으세요.
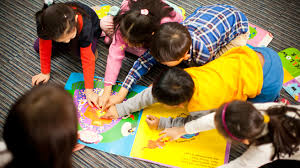
1. 학생들에게 그림이 있는 문제지를 나누어주고 각각의 그림에 무슨 일이 일어나고 있는지 이야기 해보라고 하세요.
2. 학생들에게 그림을 뒤집게 하고 두 개의 스토리를 읽으라고 나누어 주세요.
3. 학생들이 모두 읽은 후에, 뒤집어 놓았던 그림을 원위치 하게 하세요. 이야기를 보지 않고, 그림을 가위로 잘라 전개 순서로 되어 있는 원래 이야기의 뒷면에 붙이게 하세요.
여러분이 멋진 그림 영어 이해력 문제지를 만드는 방법에 관한 영감이 필요하면, “ESlFlow.com”을 검색하세요. 또한 “Cal.org”에는 이에스엘 성인을 위한 건강에 관한 글을 명백히 강조한 재미있는 그림 문제지들이 있습니다.
마지막으로, 아마도 여러분은 여러분 자신의 그림 이야기로 만들기 위해 이야기를 인터넷에서 찾고 구글에서 이미지들을 다운로드하는 일이 (나처럼) 재미있다는 것을 알게 될 겁니다. [258 words]
================================================================================================
2. Sequence: Putting Humpty Dumpty Back Together
Use pictures to retell the story and help your students to remember main plot points, characters and events of the text. Here’s how:
To prepare, you’ll need to make a worksheet of a bunch of pictures that are labeled with either numbers or letters. Make sure that there are spaces or lines immediately below the pictures so your students can label the pictures based on what they see. Depending on the level of your students, you can turn the labeling exercise into the perfect drill for practicing spelling and sentence construction.
You’ll also need copies of two stories. Make sure each is single spaced, and printed on a separate piece of paper. Label each story “Story 1” and “Story 2.”
1. Give your students the picture worksheet and talk about what’s happening in each picture.
2. Ask your students to turn over the picture worksheet, and hand out the two stories to read.
3. After students finished reading, have them turn to the back side of the story papers. Without looking at the story, students should cut out the pictures and glue them to the back of the right story in chronological order.
If you need some inspiration on how to create a great picture reading comprehension worksheet, try ESlFlow.com. There are also some interesting picture worksheets on Cal.org that focus specifically on health literacy for ESL adults.
In the end, you’ll probably find (like me) that it’s more fun to find a story online and download images from Google to make your own picture stories. [258 words]